The oath thread has finally begun! I have oathed the three Rhinos I am painting. Before the month begins you can do any conversion or assembly work you want to do on the model, but you can have a maximum of one basecoat colour across all your models.
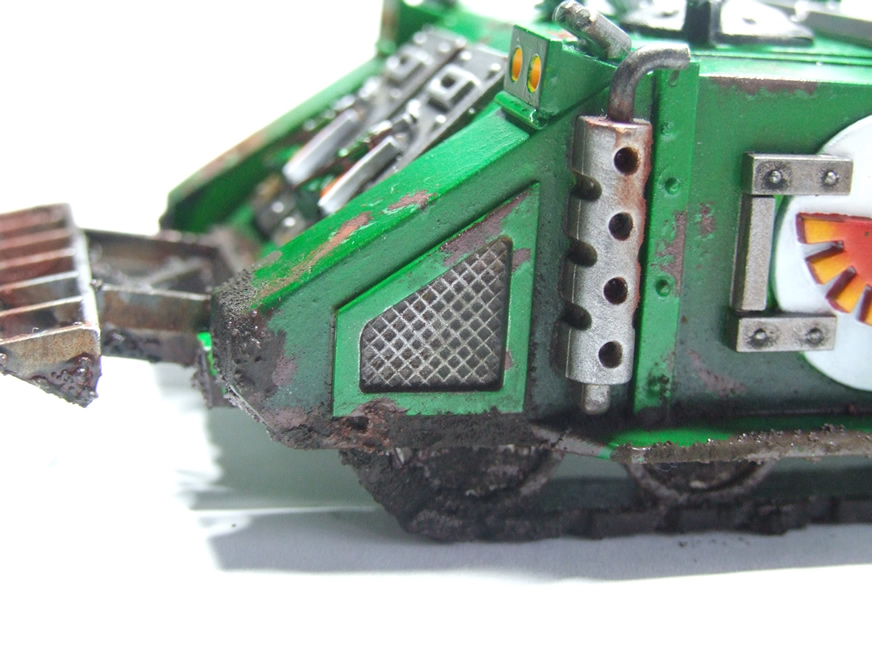
I use two different colour spray primers on things I paint at the moment – black all over and then white on the upper portion. It gives a nice gradient affect that is much more difficult to achieve with brushes than airbrushing. Then I covered them all in my single allowed basecoat before official oathing had begun. I used a 1:1 mix of Dark Angels green and the stage up green. I thinned it a fair bit – it took around 10 coats to get a nice smooth base I was happy with. In the future it will take less but this is the first time I have tried to paint tanks to the standard I am aiming for.
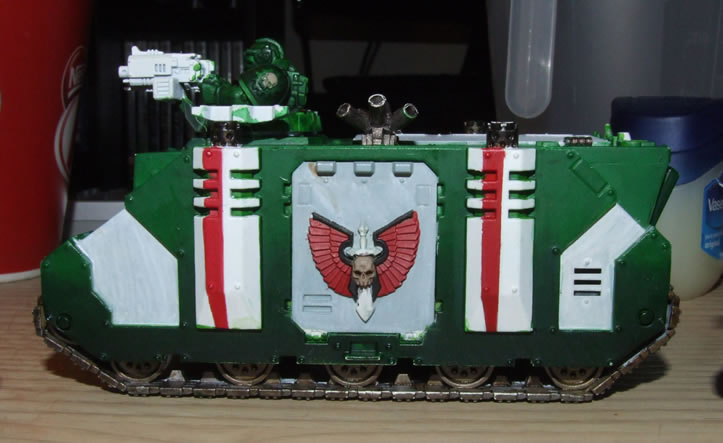
This is what they looked like for my oath post:
You can see the line under the paint where the white and black primer met. In the future when painting vehicles I wont bother and will just use white primer. On more complicated models (normally smaller ones) I found it a lot more helpful than I did here. Because the surfaces are flat and smooth it just gave me this defined line, and I ended up doing so many layers to get the affect desired on the base of the tank that the green became opaque and the affect of the primer underneath disappeared.
I did not take enough photos while painting. I got pretty into it and had the America Office on in the background so documenting my progress was forgotten. Instead I have approximated what it all looked like using photoshop!
I wanted to build up a really deep base up to a strong bright top. I started very simply with Dark angels green, thinned about 1:3 paint to flow mix, and the same with the other green. I just painted the bottom and top halves of all the sides with the respective colours – obviously darker on the bottom half lighter on the top half. Four of five layers and they looked like this;
 |
| Fig 1 |
 |
| Fig 2 |
 |
| Fig 3 |
|
It is important when painting non-opaque colours over each other, or where two colours meet to start your brush where you want your applied colour to be weakest and brush towards where you want the colour to be strongest. (Fig 2) In this case I brushed from the middle up or down. This helps create a natural gradient rather than doing hundreds of discrete stages.
But I needed to get rid of the join in the middle. This was done by simply using the same technique, but from the bottom of the tank all the way up with the lighter colour. (Fig 3)
 |
| Fig 4 |
As you can see, layer by layer it becomes a smoother blend rather than stripes. As you can see though, it does dull the darker colour. I wanted a strong contrast between the top and bottom. (Fig 4)
 |
| Fig 5 |
I mixed up 1:1 of imperial blue (VGC) and Dark Angels green. Using different colours rather than black creates more visually interesting pieces and gives them more depth.(Fig 4)
 |
| Fig 6 |
|
There was only one more stage to really bring everything together, going back to my original two colours. I diluted the two greens to 1:5 to 1:6 paint to flow mix. I used the same process as before – pulling each colour to where I wanted them strongest.
Dark angels was brushed on first, from 1 to 2. Immediately after the other green was brushed from 3 to 4. The brush was loaded with little paint to prevent smearing everywhere. Thus the lighter colour was laid into the first layer and brushed upwards. (Fig 6)
This is the result of my overly complicated efforts!
There was a lot of trial and error in here. At times my paint was too thick and clumpy and other I flooded the model. Next time I think I can get a smooth blend that you could get out of an airbrush!