Wednesday 13 July 2016

Imperial Knight Part 2 - ii

Here's the Knight in its current state, partially assembled. Biggest thing Im facing at the moment is how to fix up spray paint overfill while being rubbish with a brush.


Trying to work out what colours to paint the chest piece and a few bits not seen here like the loincloth (what mech doesnt have a loincloth?).

Retributor gold runs nicely through the airbrush but I hate brushing it on. Too hard to smooth out, goes grainy very quickly.

In the meantime Im going to be gloss spraying most of the metal parts and then doing point washes to bring back all the detail and texture.

Tuesday 12 July 2016

Imperial Knight Part 2

A few update pics for the evening;


These were taken on my phone which has done some odd; warm colour correction. You can get the general idea though.

Gold basecoat was Retribution armour by citadel followed by gold from the model colour range. Going to be followed up tomorrow with some washes to deepen colour range.

You can see in these pictures how I went back over the blue to give the shadows a deeper tint. I used a 1:1 mix of Royal blue and royal purple from model colour and airbrushed that onto the parts I wanted to be darkest.

I have to go back over the blue tomorrow because I managed to overspray a very fine cover of gold onto the body and couldn't get it off without scrapping away the paint underneath. Doh.

Next up: learning how to fix the spots you couldnt mask off properly before applying a completely different colour. I cant wait.

Imperial Knight Part 1

I have the Renegade box set from Games Workshop - 2 Imperial night models for just over the price of one on its own. I had intended to do blog about the whole process but the assembly and preparation of the model has taken so long and been so un-fun that I couldnt face writing about it after doing it.

I wont get started on why I hated it because I'll start on a tangent I'll never get off of. Suffice it to say, I normally enjoy the assembly stages but for this I just wanted to put it all back in the box and never bother with it.

I persevered, and have reached the part I do enjoy with every mdoel - painting!

Back to the airbrush with this one. I am only painting one for now - the other I have secret plans for that will be revealed when it is closer to being finished...

I had trouble settling on a colour scheme. I want to sell it when its finished, but had no idea what paint scheme I should go for to give it the broadest appeal to potential buyers. I dont know enough about specific army paint schemes and what insignia matches what and would exclude things from being thematically appropriate for what groups. I've tried wading into it. I waded out pretty quickly.

Surprised myself by settling on a colour I normally hate due to its pervasiveness in GW marketing and how flat it tends to come out in paint jobs: Blue. Not only is it a colour I normally stay away from, I hadnt even brought my blue paints with me. To the paint shop!

After oscillating between different paint stands for an hour and painstakingly inspecting bottles as I held up almost identical paints to the sunlight, that I found a shade that has turned out beautifully with more depth than I thought I would get out of a blue.


The royal blue here. I picked up the andrea blue so I had a blue highlight to hand but the star of the show is definitely the Royal Blue.

The Retributor Armour I picked up to try on an Iron Man model but ended up using for details on the Knight.

Here's the blue pieces in their current state:


There's a few more - shields and guards that go on the legs that have been painted the same.

Layers were simple;

Everything thinned with vallejo airbrush thinner; my new airbrushing holy grail.

Layer One: Royal blue, all over.
Layer Two: One drop Royal blue, two drops Andrea blue
Layer Three: Two drops Andrea blue, One drop Ivory

Second two layer were applied on progressively smaller, higher parts of each surface. When Ive assessed how the pieces look together Im going to do some work to deepen shadows and get some subtle contrast in.

In the long run learning high contrast painting is my main goal. I keep trying to sneak it in here and then but I dont know enough about colour to achieve much.

The gold has a nice warm, reddy undertone which matches it nicely with the royal blue base.

Im using new metallic paints as well. I bought them a while ago and just havent used them until now. Im not sure what they are made with - they are still vallejo paints but so far seem far better than any of the other vallejo airbrush metallics.

I started on the model with vallejo black metal. The finish wasnt very smooth and it was leaving huge amounts of pigment drying up in my airbrush cup and nozzle. Granted - I havent retried it using some of the vallejo airbrush thinner BUT they are supposed to be used straight out of the bottle. When I gave up I had to disassemble to brush and pull out big lumps of dried up metallic paint. Not impressed!

I can find the name of this group of paints. I think it might just be "Metal Colour". So they have, air, game, model and metal colour paint lines.

These paints are thinner than any of Vallejo's other paints. They self level on the surface. Once you've got the hang of them getting a really shiney, flat finish is easy. Much better than the surfaces and reflectivity Ive gotten from other metals. They are designed to be airbrushed and Ive read a few reviews saying if you want to brush paint, normal metallic paint is better/easier.

I love, love, love them. Ooooh super love these paints. I started with steel all over then aluminium from above. Next stages are going to involved airbrushing light layers of thinned black wash on deeper areas to intensify and mattify the shadows.

I couldnt get a photo showing off the excellent finish anywhere near as well as it appears in real life.


The texture you can see is down to my not airbrushing it on correctly. It takes a moment to self level then dry in place. You can blown it around while its drying and it bunches up, similar to pushing a brush through partially finished paint.

On the chest piece I used the Vallejo Metal Colour Exhaust paint. It has that oil stained, offcolour grimey look that heavily smoked or heated pieces of metal get. Highly recommend the paint even though the picture doesnt show it off very well. If the sun comes out again Ill try and get some better pictures of everything.

The Vallejo washes that come in the same pots are great too. Im trying to control ùyself and not buy all of them and the rest of the metal colour paints.

The local shop has a Harder and Steenbeck 2 in 1 airbrush with .2 and .' mm nozzle/needles that Im also wringing my hands about buying. Super want, do not need.


Sunday 3 July 2016

Metalwork and Leather

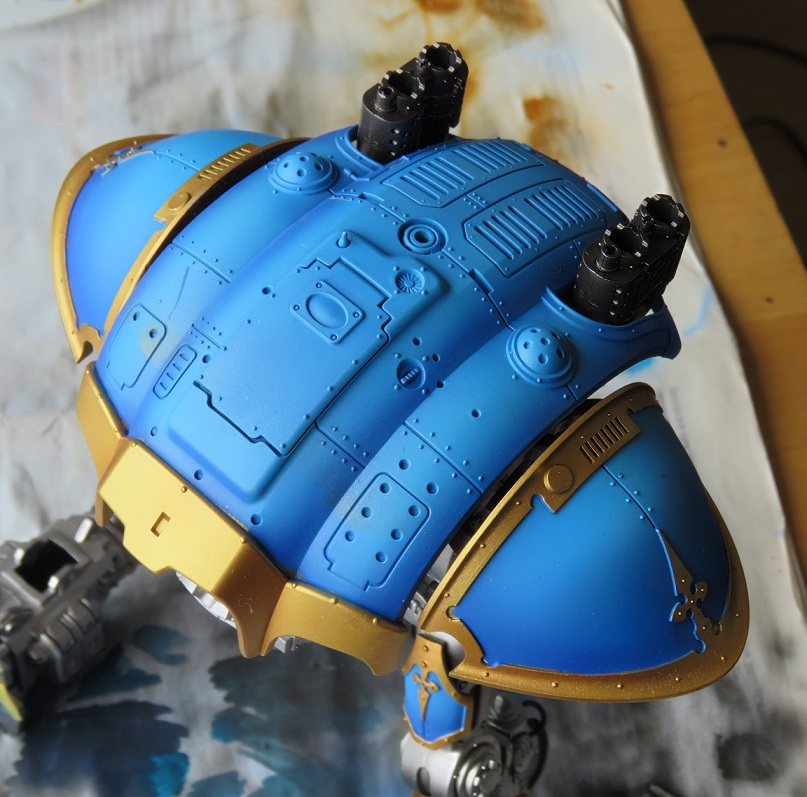
The bits I'm painting on my ork at the moment are metal; gun, claw hand and boot covers.

I want to go a step above the normal approach of black, metallic, wash, highlight and maybe some scratches. Get some texture and miniature realism in there! Any time I do something new I prefer to collect a bunch of images and examples to emulate rather than wade in blind.

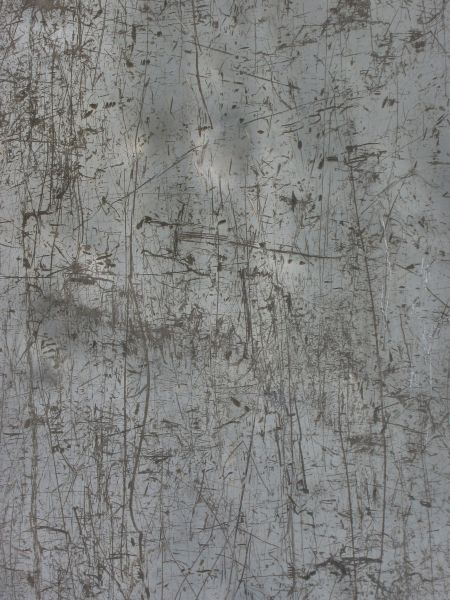
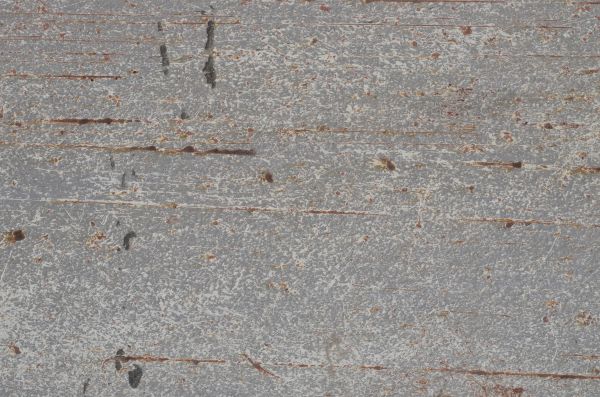
First I rummaged through online photographic libraries for different types of metals to find what kindof thing theyd look like.


In typical lore Orks are not careful with their equipment, either in battles or when it comes to maintenance work. I wanted to go for a beaten, well used and poorly looked after look to everything on the model. One thing that stood out to me is how... unmetallic all the photos of metal I looked at were. Quite far from what shines back at you from any pot of silver paint.

I didnt want to dive into non-metallic metal out of the gate. It requires too much brush skill and know how than I have yet. Instead I decided to try painting on some texture similar to what you can see above, on the metal parts of the model.

Not completely succesful. I would get what looked like the start of some texture down and then go to far and end up with a smooth silver blend. Over working and my brush strokes were too heavy. I wanted to make tiny dots and scratches but would put down marks I thought were too visibly "brush-like" and work it over.

In the end Ive settled for doing a smooth blend of lead belcher + black to pure boltgun metal with black glazes. I might go back later on to try and introduce the texture I was going for but I dont want to let myself just paint one element repeatedly until I think its perfect. I know from experience I never think anything is finished and dont want to stop redoing it.


Instead I moved on to trying out painting the leather on the model. This was easier than the metal because there were plenty of mini painting tutorials on painting the type of leather I wanted to have. I was surprised by how difficult it was to find any tutorials on painting damaged metal to be honest. Come to think of it, I couldnt find any examples of what I wanted on any minis I looked through either.

My approach to learning new things is to find and emulate lots of examples before I feel confident enough to make stuff up. I hate the sensation, if I try doing something new without an arsenal of known methods and tricks, that I'm wasting time on something that wont work out and I wont be able to recover. So for stuff like this I start by finding examples that are aesthetically pleasing and doing my own ham handed versions of them.

I have trouble imagining what I want without references to base it on - my brain is too permanently frazzled to hold specific images in mind and know how to translate it into reality. With words, concepts, or action its easy. Specific static images I cant do at all. What a good characteristic for a wanna be artist!

The combination of this with not having refined brush skills makes me very unwilling to jump in blind. Hence all the rambling and collecting images and tutorials all the time.

Back to the leather!

These were the guides I found that gelled with how I imaged the final Ork.

I know I just said I cant imagine how things look; I do have a general sense of the impression I want things to give and the art style I want to achieve. I can hold rough colour schemes, effects and tone in my head. Just not how it is expressed technically.

Another reason I like setting out looking for particular tutorials and WIPs is its a very good way of stumbling across blogs and resources you wouldn't have come across otherwise.

Like this blog with these two leather tutorials;

http://twistedbrushes.blogspot.be/2012/09/textures-leather.html

http://twistedbrushes.blogspot.be/2013/06/einsteins-apron-leathers-sbs.html

Not updated for a year but still an archive of great painting and walk throughs.

And more;

http://thor-modelling.blogspot.be/2012/10/tutorial-how-to-paint-cracked-leather.html

http://www.planetfigure.com/pages/Painting-Leather-Boots/


Neither elements on the model turned out as well as I aim for, but it's all an improvement in brush work nontheless. I definitely got some more visual interest on the claw than I'd normally get, but the shoe covers just look like I'm bad at putting a wash on.

The trousers I had problems with one of the colours I used - the base was a mix of brown and yellow to try and recreate a colour similar to citadels old ochre foundation paint. The yellow I used is too old and the some of its has turned into tiny dry balls in the main body. Gave up getting a smooth coat and covering the texture problems to save my sanity.


I had real trouble with the face plate on his chest - I had absolutely no idea how to paint it and in the end just went with dry brushed metal to get it over and done with.

The leather on the shoes and top proved to be too difficult for me. I couldnt get it to look like texture rather than badly applied brush strokes. Colour choices weren't great either. The leather weapon holder on his back I was happier with. Having given up on texturing the shoes I focused on putting down some more colour variation here instead. It looks better.


The skin is the part I felt I have done best on. I wanted to push it more but ran out of both time and patience. Perhaps after taking a break on another model I'll be happy coming back and putting more work in. I tried using yellow wash and glaze to bring out some final highlight layers but that actually just messed up my final few layers of work. Beginning to get suspicious of the quality of several things I bought from games workshop recently. The tiny yellow dots you can see on the model are from the glaze and something I couldnt remove without scratching the paint around off.


I havent glued the whole thing together and sculpted the joins because I anticipated not being happy with the results and stripping it to start over.

Nothing turned out the way I wanted to or expected. I definitely improved my brush skills and general approach to painting, however, so it's far from a waste of time and effort.

Onto the next tiny plastic thing!

Thursday 16 June 2016

Im terrible at Painting

Salutations fellow nerds! Ive decided I want to work on my brush painting. Ive reached a point where with the right model I can get some pretty nifty paint jobs done, like the screamers and the pheonixes Ive painted.


I want to catch up the standards of my brush work before I continue forwards with my airbrush. I keep reaching points where I have things that have to be done by brush but I can't match how the rest of the model looks - its jarring seeing good airbrush work next to ham handed brush work!

I oathed the special Ork model from the Assault on Black Reach set, meaning I have to finish painting it by the end of the month. I'm trying to do it all by brush and uhh... Its not going so great.

The current problem is the finish of the paint. I keep ending up with a very plasticky finish that doesnt take subsequent layers very well. Ive tried everything from super thin to super thick layers, only thinning with water, thinning with mediums and so on. No matter what it seems I always do something slightly wrong that leaves me with this imperfect finish.

It would be like picking up a random plastic toy from a shop and trying to paint straight on it, that's how it feels.

When I reach that point I use a liberally applied wash over the part that's gone plasticky because I know even a flood of games workshop wash dries to a good, toothy finish. Then I start again with a new type of layer and keep trying.

It doesnt help that Im painting with greens and yellows which are my least favourite colours of mini paint to use, since they seem to have an inherent tackiness to their texture. The only exceptions Ive come across so far are a couple of the old green foundation paints by Games Workshop and some of the panzer paints from Vallejo. I havent tried the new games workshop base coats so I might try having a poke at them soon.

I'll add some pictures of the work so far to this post later on when Ive managed to pry them off of my phone.

Monday 30 May 2016

Tutorials I

I'm a sucker for tutorials. Especially step by step painting ones or sculpting videos. Even when I'm not up for painting at the time, I find them really relaxing to watch or read through. I spend quite a bit of time scouring the information superhighway looking for ones I haven't read before. Here's the latest bundle I've found.

Some of these are in other languages but you can use the google translate option. If it doesn't have a dedicated "Tutorial" section but I've still included it on the list it means they still do WIP and guide posts. Flick through!

http://haekel.free.fr/spip.php?rubrique5

https://davidneat.wordpress.com/

http://www.feldbahn-modellbau.ch/

http://gidian-gelaende.de/&usg=ALkJrhiCXuAODo2EmxPivoIinbq-0wQnQA

http://tabletop-fantasywelten.de/&usg=ALkJrhhevZXl-0pFFOPcm1TI_OIZoeKtIg

http://smallscaledugout.blogspot.co.uk/

http://rustandthecity.blogspot.co.uk/

https://manorhouseworkshop.com/

http://dievincis.blogspot.co.uk/

http://taleofpainters.blogspot.co.uk/

http://fantasy-gelaende.blogspot.co.uk/

http://cursedtreasures.blogspot.co.uk/

http://mistralvernati.blogspot.co.uk/


Necron Scythe

I've ~ kindof ~ completed a model. Less completed, more painted to a point where I could say "It's finished" and then hide it in a box.


To help me enjoy painting more and paint more consistently I've been going into models and writing down specific things I want to achieve. I plan the paint scheme ahead of time and what technique I want to use/practice.

In this instance I was looking to brush up on my air brushing skills. It's been a long time since I've done it and I've got some really nice models I need to use it for. (I have a couple of Imperial Knights waiting, for example. Not models you want to use a brush on)

As mentioned in a previous post, I have a problem with patience, blockages and cleaning. Of the airbrush, I mean.

When painting this I made myself slow down a bit and clean out the airbrush whenever the flow started to change or it felt/sounded different. Theres a characteristic sound to paint that's flowing neatly and a distinct change when it's interfered with. Even though I was taking it apart and cleaning it out fairly frequently at the beginning, doing it properly meant I wasn't letting huge problems build up that required dedicated fixing. After a while, as I got used to using the kit again, the problems became less frequent and overall things sped up and became more fun.

I still had problems with the surface my paint was leaving behind. A problem on two fronts: paint wasn't sticking to my primer properly and wiping off the moment it brushed again something. I had to touch up all the edges and corners with thicker and thicker paint using a brush before I could take my finished photos. Second problem: graininess.

I dont know if you can tell in these photos but the base coat colour (A 2:1 mix of dark angels green and chaos black, thinned about 1:1 paint to vallejo airbrush thinner) was leaving behind a minutely speckled surface. The kind that needs stripping and redoing to fix properly. It happens because paint is drying en route to the model. Forms tiny dry spheres before meeting the surface and getting sealed into place.

As mentioned in my previous airbrushing post, this can be down to many factors. There's no real formula to stopping it happening because you can change each of these things in different ways to come up with a unique solution.

I changed a lot while I was working and ended up in the general situation of keeping the 1:1 paint to thinner ratio, a PSI ~ 12-20, and working a few inches from the surface. Keeping on top of the state of the tip/cap and stopping before blockages helped prevent paint drying or blobbing as well.

Moving on to the green elements and the glows the smoothness of the paint improved greatly. In fact, it was originally much better than you can see in the pictures above. I was trying to build up really thin layers while putting down the green blends and had a few incidents of pooling paint and creating tide lines/spider legs but nothing I couldn't fix.

I reached a point where I was really happy how those parts had come out, not least of all because I had found with very careful manipulation I could use my Iwata Neo to paint lines as thin as the dividing sections on the hull of the scythe.

To make it really pop I wanted to use a yellow glaze. Oh I thought the yellow glaze would look great!

Fuck the yellow glaze.

I used a brush to paint the games workshop glaze over the sections. It was fine while I doing it. I looked back half an hour later to see if everything had set to find that it had resolvated the lower layer of paints and then dried in all the edges, like I'd put a thick wash on too soon.

Partially my fault - I need to add more matt medium to the mixture when I'm using super thin layers because they keep lifting if I use a brush on them. Or just continue airbrushing over it. I'm flipping the bird at the glaze though. I put on a thin, careful layer. It ended up slipping about like a wash and ruining the smooth surface.

Overall though, good practice piece. Fixed a lot of problems. Sadly I just found the model unpleasant to paint on top of being ham handed about it. It will go into a foam case until I did it out and strip it in a couple of years, hopeful that I'll enjoy it this time.